
There is no “one way” to freeze your deer. I’ve tried a lot of ways, but the method I use now is practically bomb proof. I’ve had roasts go for 3 years with NO freezer burn.
Now, I’ll tell you one thing: I HATE using plastic. I’ve tried more natural ways to freeze meat. Wax paper and kraft paper and butcher paper. Most of the butcher paper you can buy: coated in plastic. Wax paper: coated in plastic.
There are of course “natural” versions of these you can find. In the end, they all work (plasticized or natural) – but not for as long as the method I’m going to show you. So yes, I’m a hypocritical human, but my meat never spoils!
When I butcher my deer, I like to bag it and freeze it as I go. This has a few benefits – especially if you are working on your own:
- You get a break from the knife work: You will be glad for a break if you’ve been clutching a knife in one hand and clenching meat/bone with the other for an extended period of time.
- It spaces out the timing of things going in the freezer. This CAN help to freeze things quicker – but if you have a stand-up freezer, the extra opening and closing may be counterproductive.
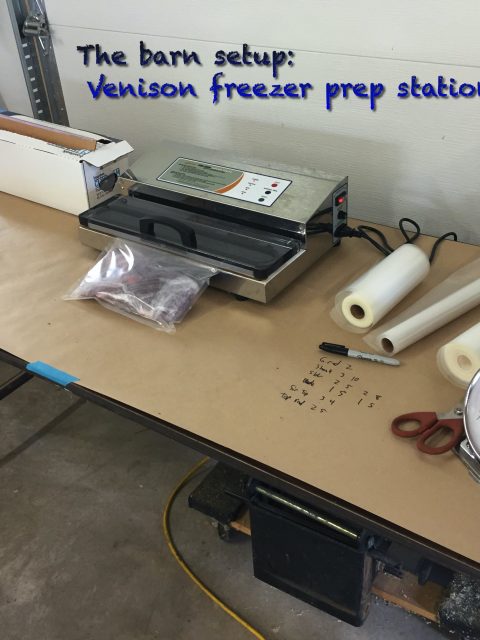
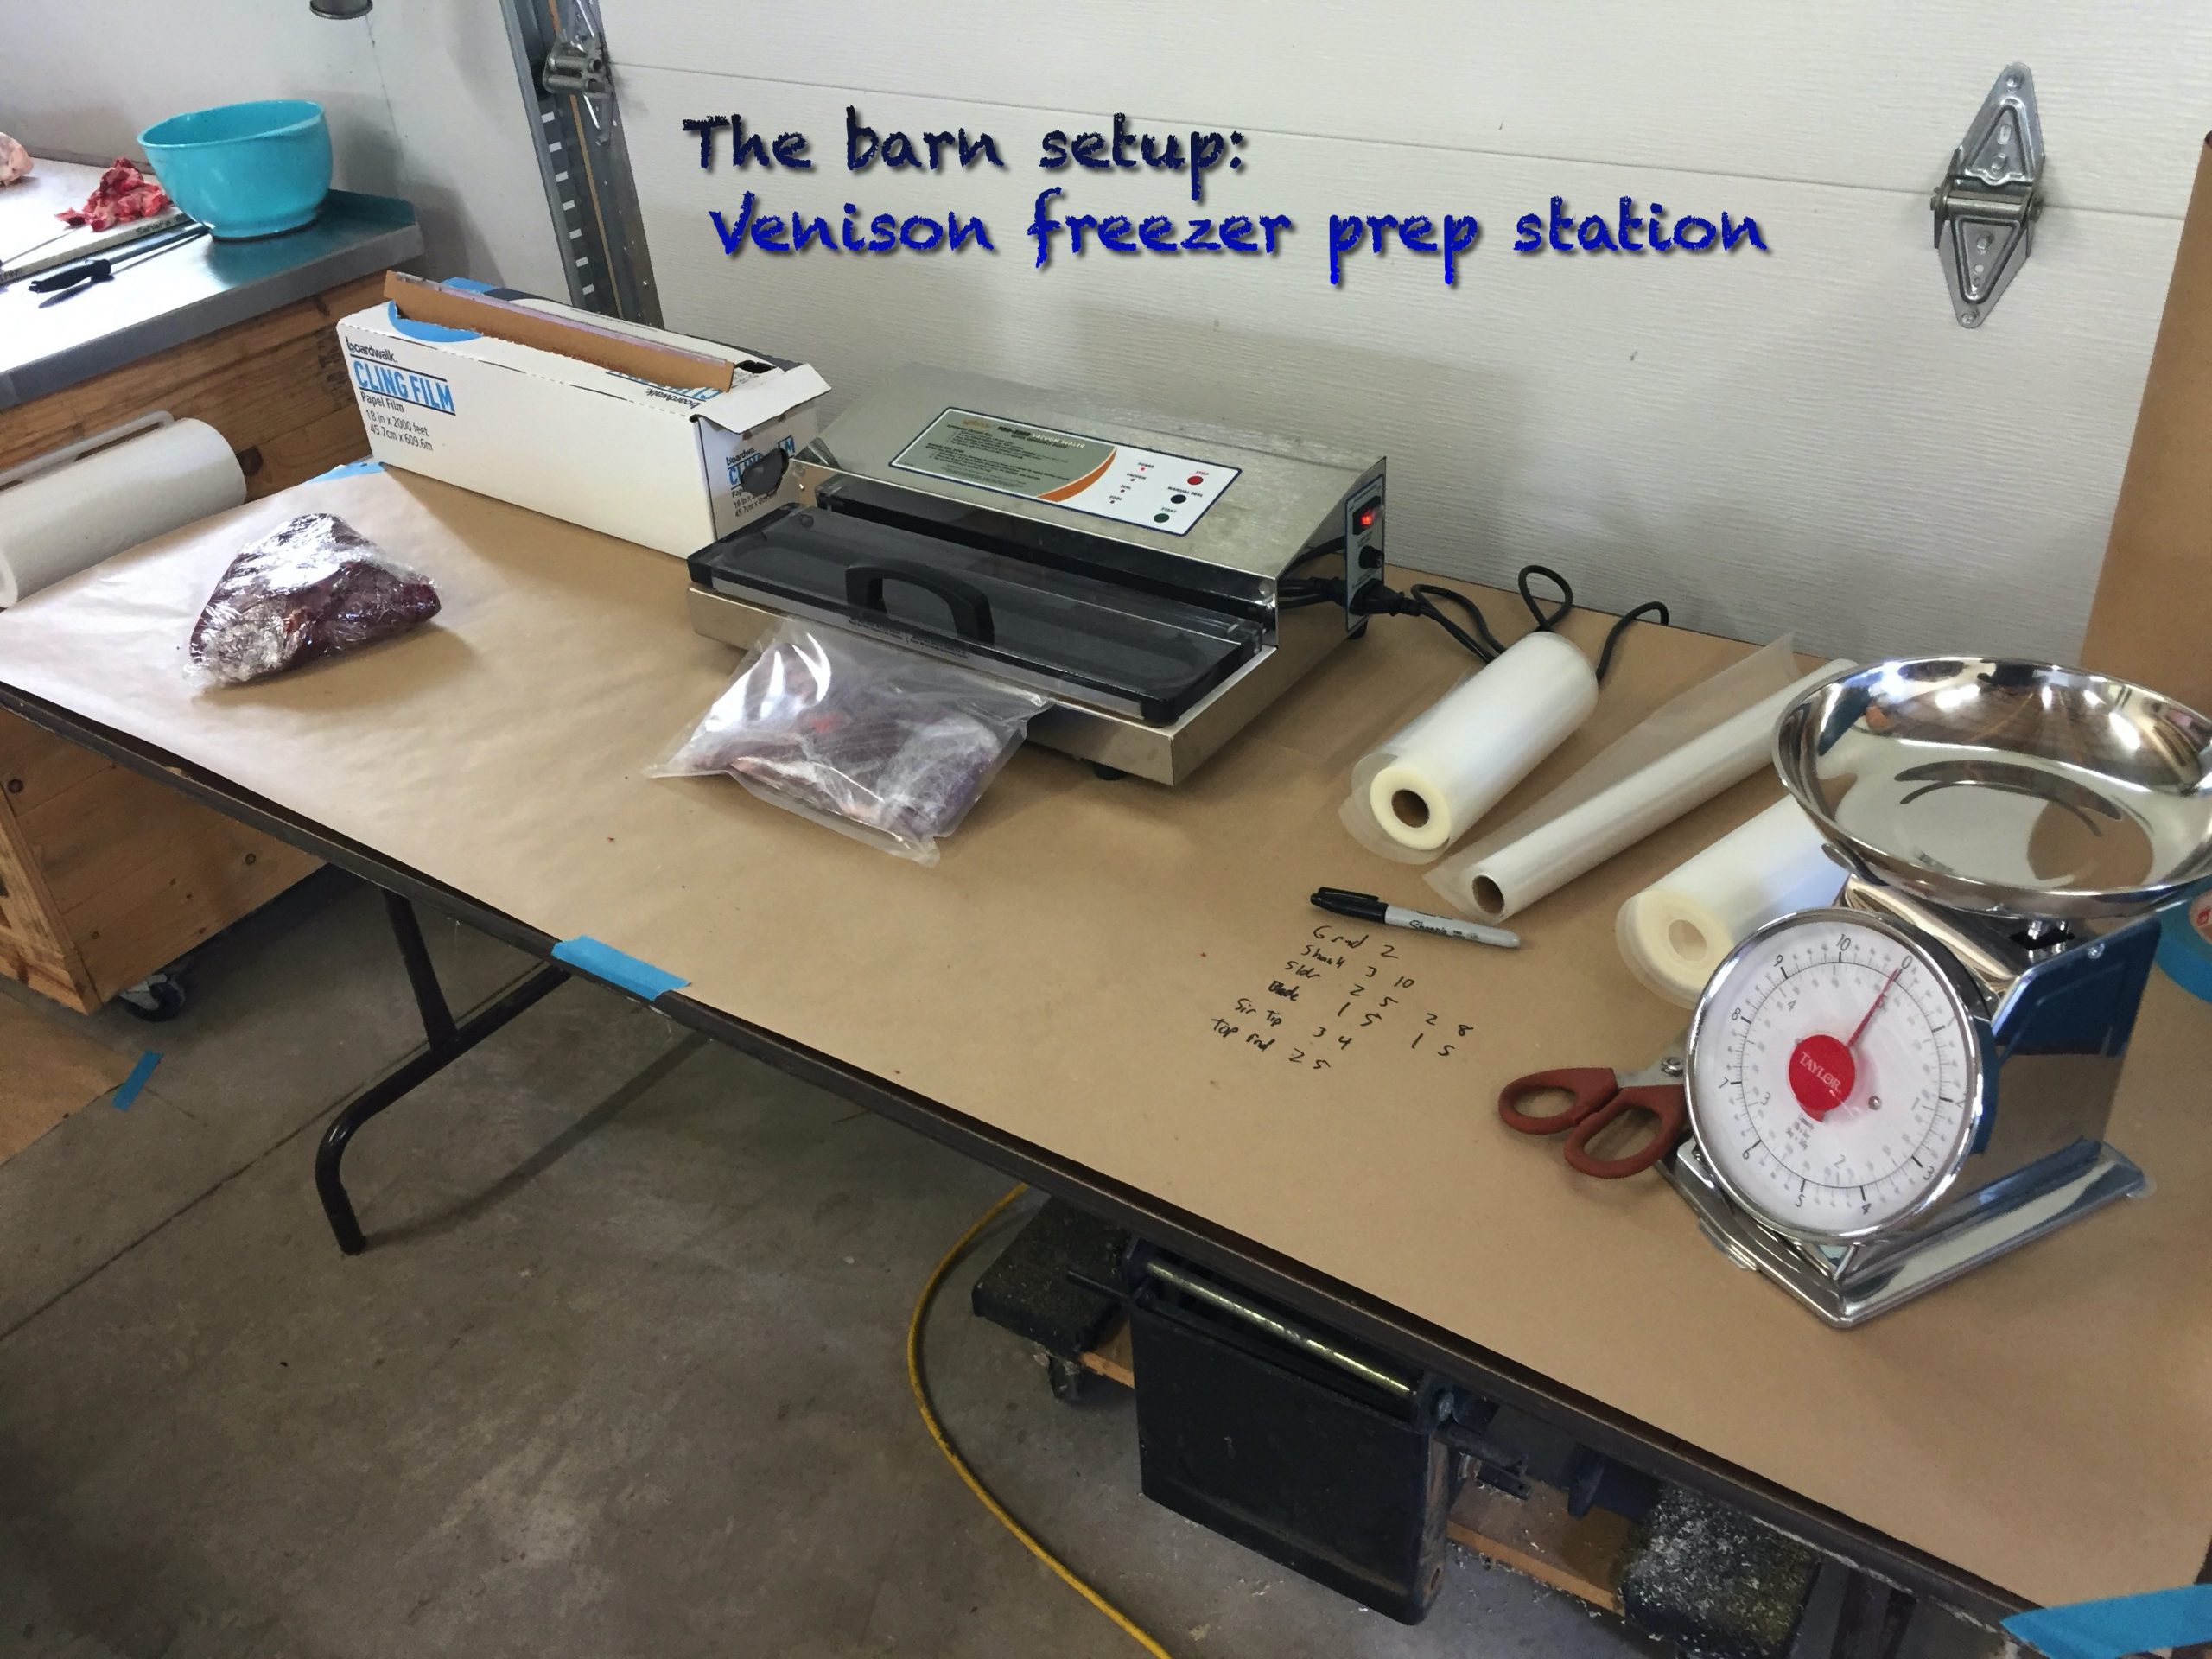
So, first thing’s first: you will make a mess. You are moving messy things around. And you are cutting messy things. You will get blood on the floor. You will get meat and fat clumps on the floor. And the same for your tables. I have a stainless steel table with a big cutting board on it where I do my actual cutting. This is easy to clean when I notice it getting too messy. For EVERYTHING else, I put down a layer of Kraft paper. My table where I wrap, weigh, and vacuum: Kraft paper. My floor between my cooler and my cutting space: Kraft paper. The floor between my cutting space and my wrapping space: Kraft paper.

The Kraft paper really doesn’t let any blood soak through (as long as it doesn’t sit in a pool for an EXTENDED period), and when you are done, you can recycle it (if you didn’t get it bloody), burn it, or throw it out.
I keep as much of my deer in whole meat roasts as I can. To wrap it for the freezer, you just need three things:
- Plastic Wrap (18″ by 2,000 ft!)
- Vacuum Sealer Bags (multiple widths)
- Vacuum Sealer
The process from here is easy: cut a piece of plastic wrap the size of the roast, and wrap it. Squeeze as much air out as you can (you’ll see the “bubbles” where the plastic isn’t in contact with the meat.
Now, cut another piece of plastic, and wrap it AGAIN.
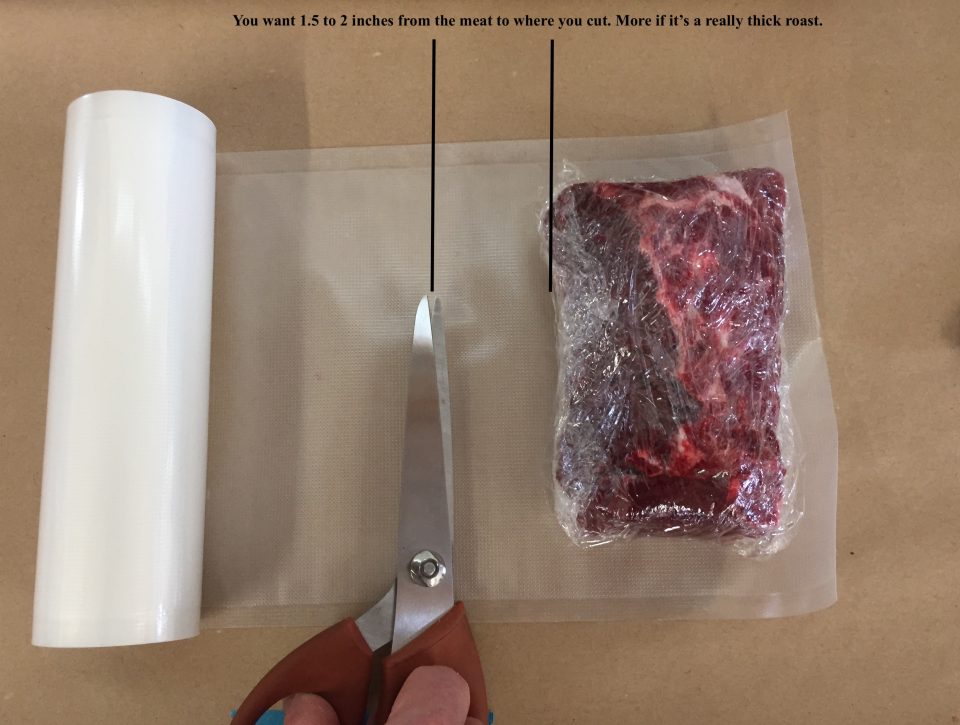
Now, cut a vacuum sealer bag big enough for the roast to fit in. Seal one end. Insert meat. Vacuum seal it. It’s ready for the freezer!

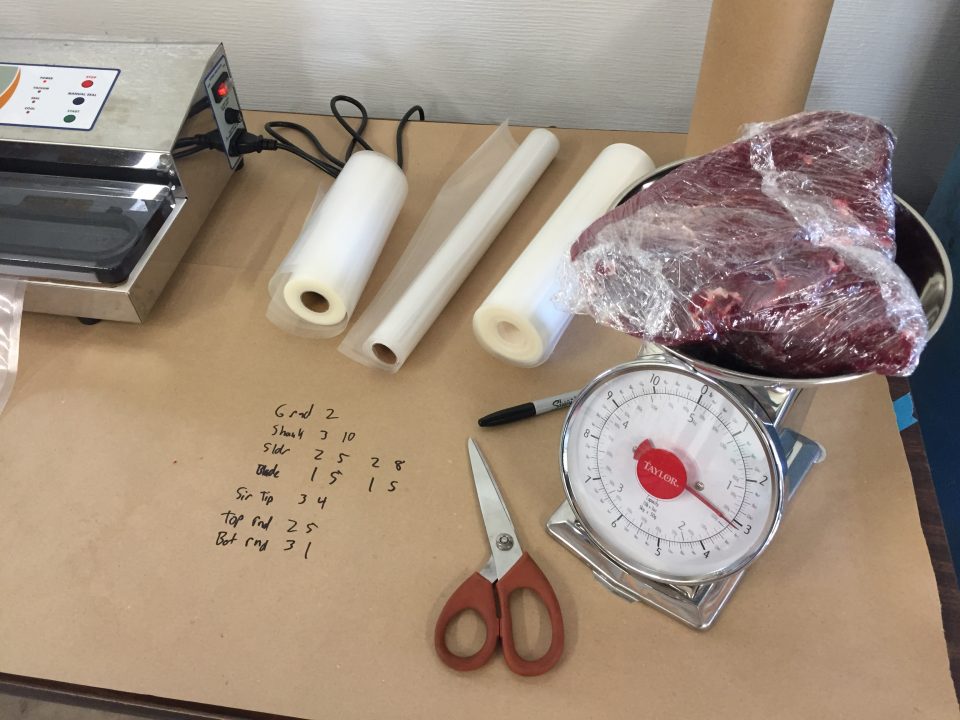
Now you may have noticed some writing on my table. And a scale. After I get my roast wrapped in two layers of plastic, I pop it on the scale. Then I cut and seal the one end of the vacuum bag. While this is going on, I write down my roast weight. When all is said and done, I can tally the numbers up and know EXACTLY how much meat I got. Just FYI – the line that says dog is for the gnarly scraps that I’m not interested in eating – but my dogs won’t mind at all – too much connective tissue, too much exposure when field dressed, maybe a little bloodshot.

Now, this works great for roasts. For trim meat that will end up getting ground up, I simply vacuum seal that in 2 pound increments. There is really no way to get ALL the air pockets out from trim, so I do the best I can and seal it up. When sealing any of the cuts (roasts or trim), as the sealer is vacuuming, pull out on the sides of the bag. This helps any missed air pockets escape that otherwise might get stuck.
I keep a clean cooler next to my prep station. Once things are sealed they go in the cooler. When I have enough, I make a trip to the freezer.
And that’s it! Use your trim meat earlier – it should last 6 months to MAYBE a year just vacuum sealed. The rest – eat them when you want, knowing they are as safe from freezer burn as they can get!
Related Posts
-
 How to wrap your venison for freezing
November 16, 2020
How to wrap your venison for freezing
November 16, 2020