

If you live far enough north, as the various deer seasons progress, it tends to get colder. And batteries don’t like the cold. How often have you gone to check a trail cam and – it’s dead. And how many batteries does it take? 4? 8? More?
The good news is that trail cam manufacturer’s are improving the efficiency of the units. The bad news is, you are probably still running through dozens of AA batteries every season. So I’m going to show you how to make a battery pack that should cover your whole season.
Disclaimer: I don’t incorporate any safety features in this build. Use these instructions at your own risk!
This is for trail cams that have a 12 volt port only – check carefully to see what your trail cam uses.
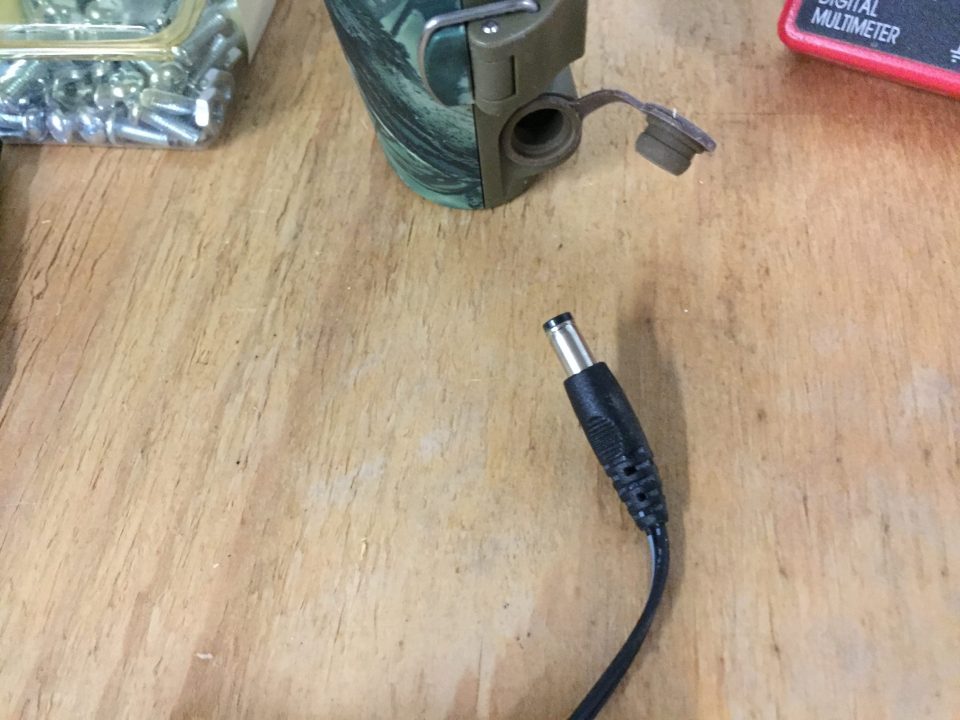
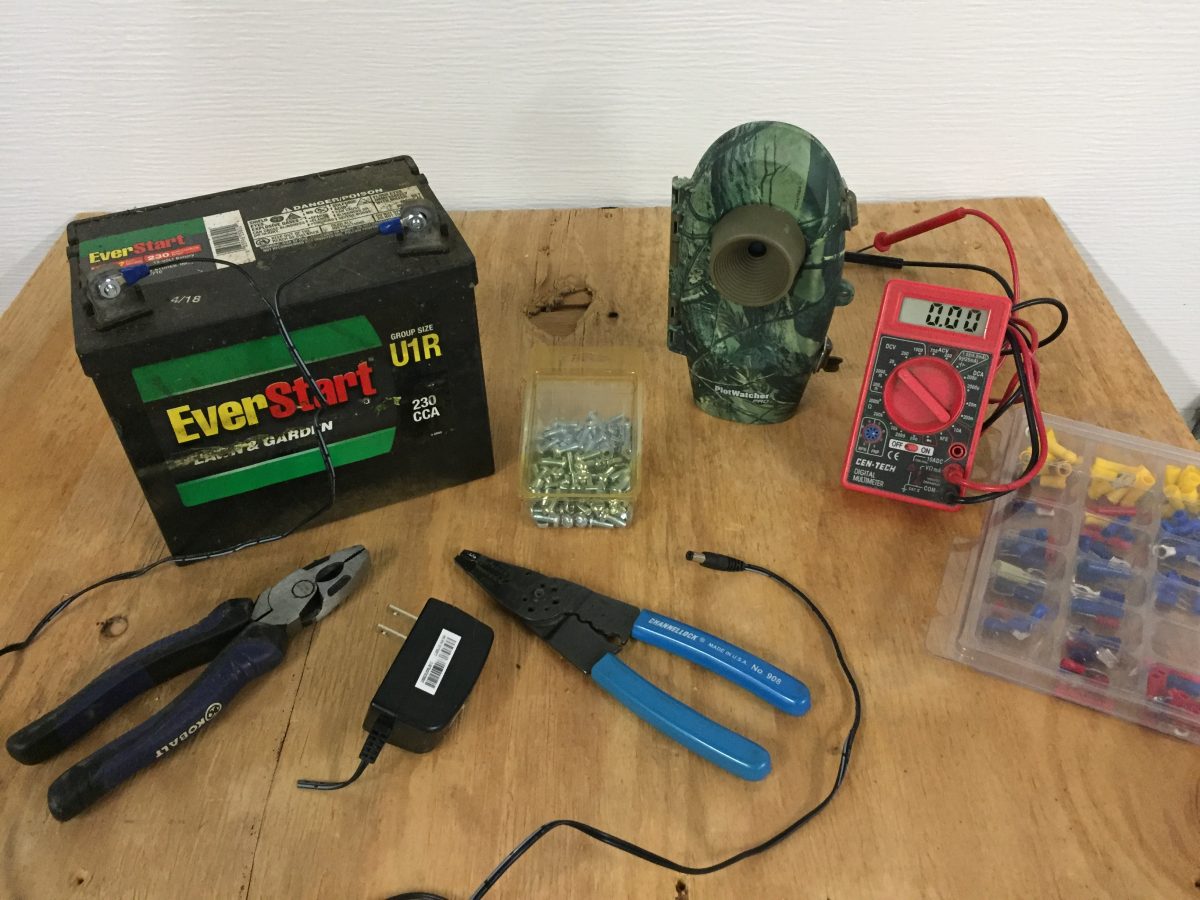
Step 1: Find an old wall-wart that has a plug that matches your trail camera. Most trail cams have a 12 volt plug port. Most 12 volt wall-warts use the same connector. If you can’t find a wall-wart, you may have an old car cigarette lighter plug that has an end that fits. If all else fails, the ends are pretty cheap on Amazon.
Cut the wire as close to the wall-wart as possible, so you have the longest cord you can get.

Step 2: Find a 12 volt battery. I have multiple lawn mowers with electric start. And when it gets cold, I don’t need to mow, so I charge one up, and use it here. If you need a new one, it’s probably still cheaper than all the AA batteries you would run through without a battery pack. You can get a cheap 230 CCA lawn mower battery at Walmart for the $20-$30 range, or you can get fancy with some gel batteries. I just used what I had.
Step 3: Strip the ends of the wire, and crimp some 12 volt crimp on connectors. Use some nuts and bolts (and washers if needed) to connect the wires to the battery.

Step 4: Test the polarity of your set up. All the trail cams I have use a positive center to the plug. So hook up your multi-meter, and make sure that your battery is charged, AND that the polarity is correct. A lot of cameras will actually show a diagram of the expected polarity next to the port. This is the most dangerous part: if you reverse the polarity, you may ruin your camera – don’t say I didn’t warn you!

Step 5: Find a box for your battery. I had an old ammo box laying around. The battery terminals were just a bit too high. I actually cut the terminals down to fit on one set up so I could close the box. You may have one of those plastic battery boxes that trailers or RVs use. They fit even better! If not, they are around $10 at Walmart. Always check the measurements before you buy!
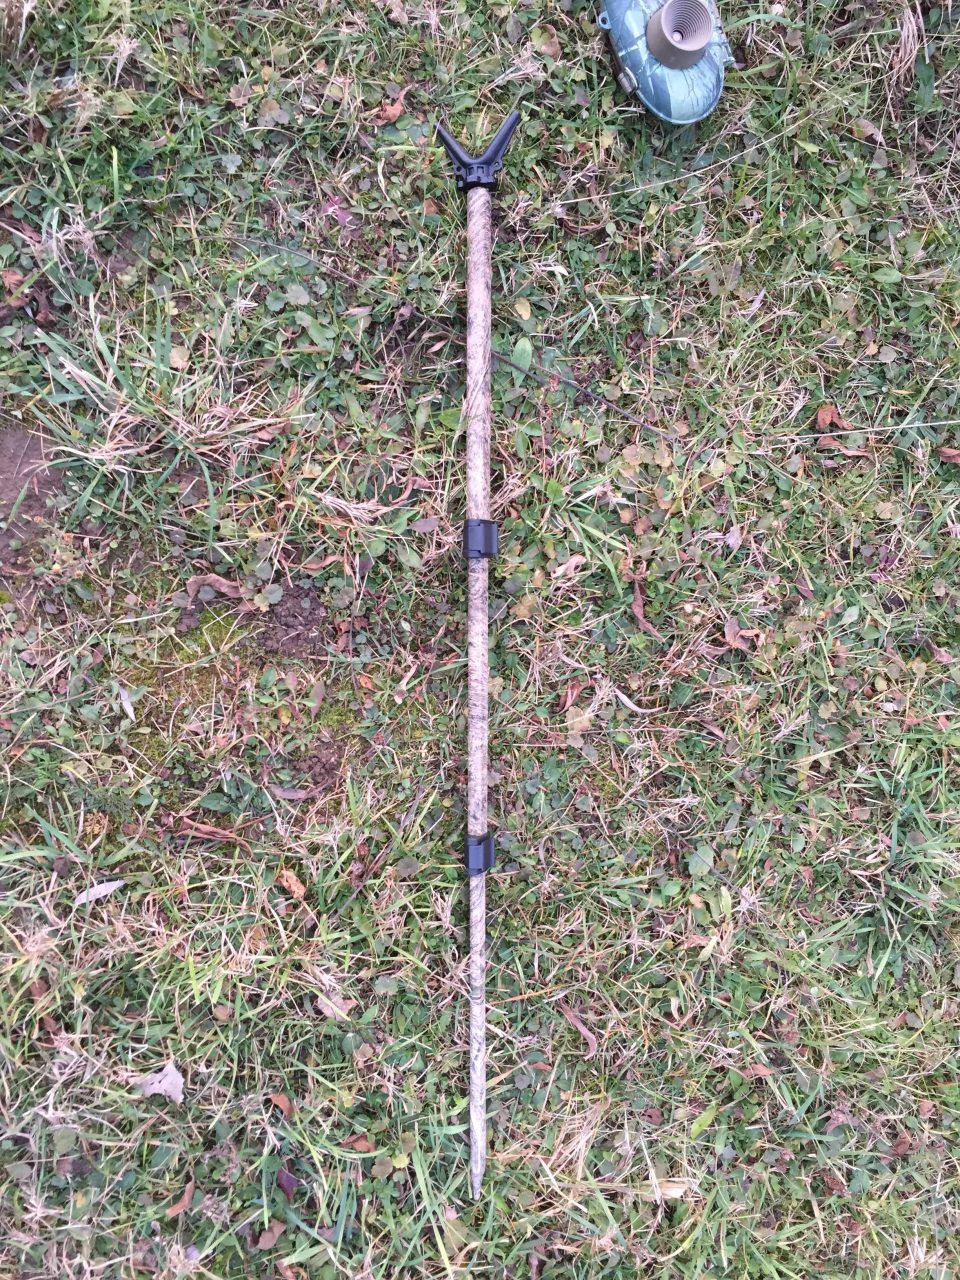
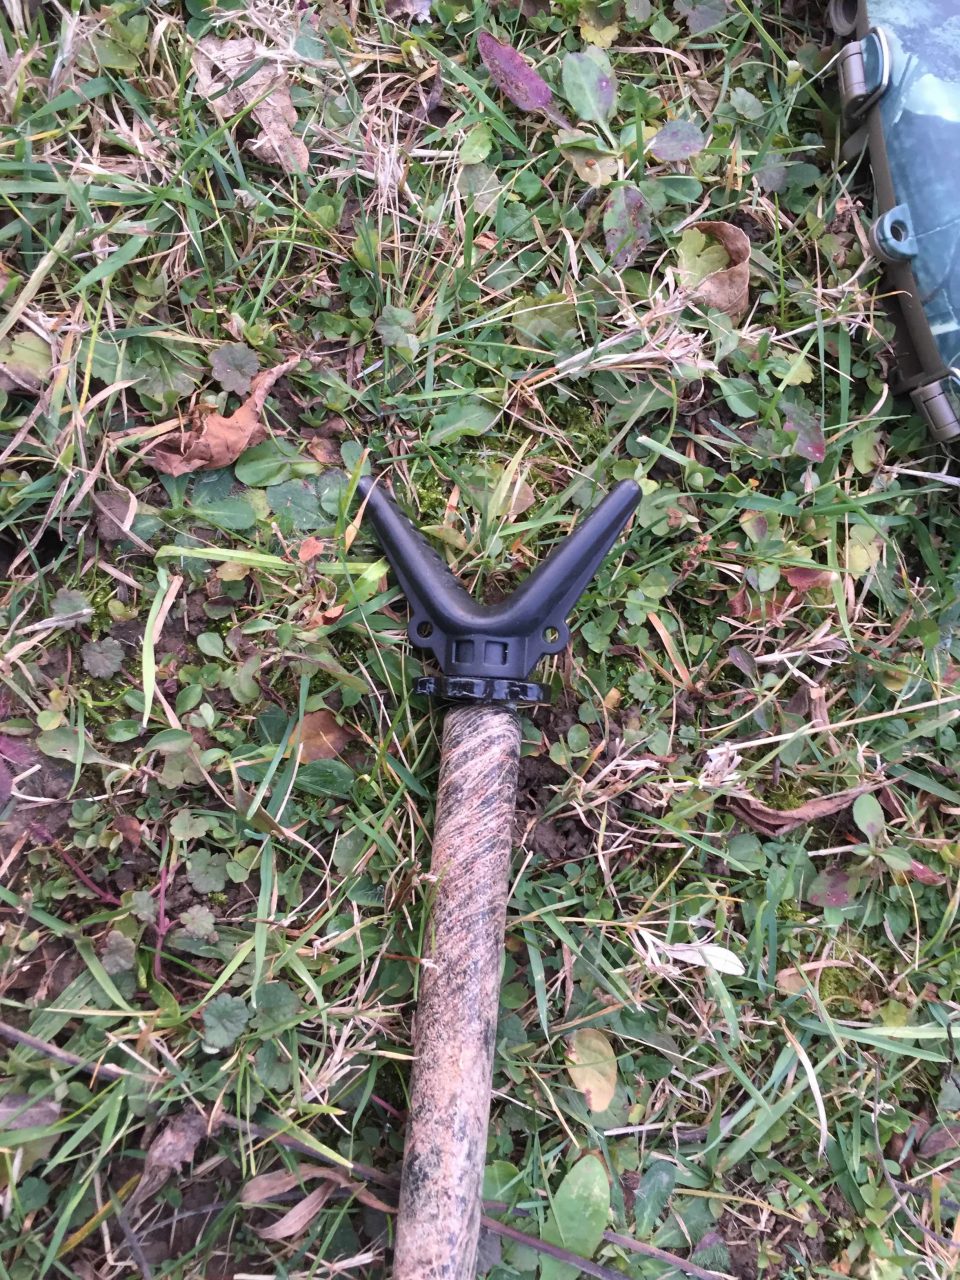
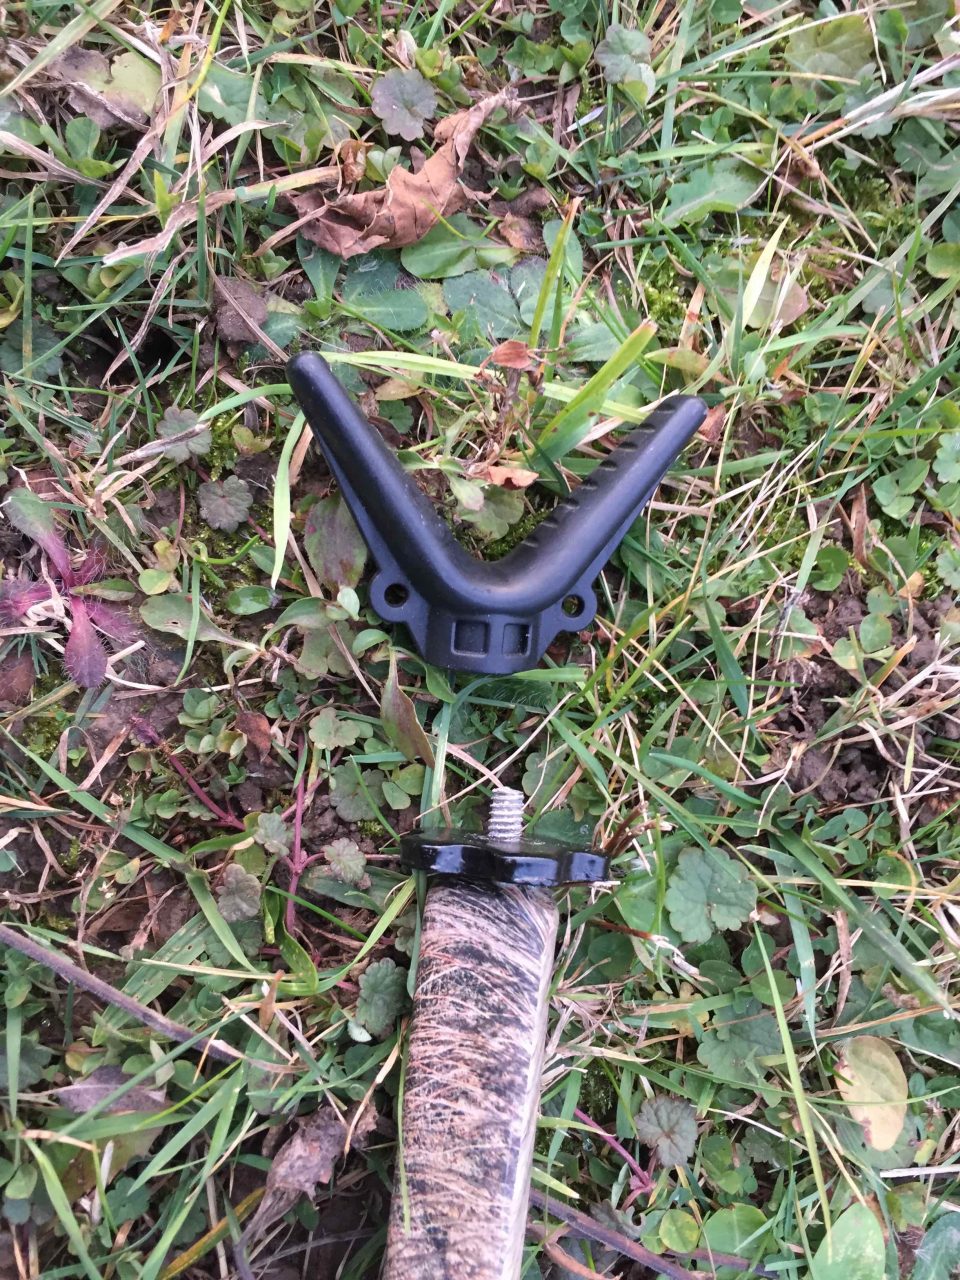
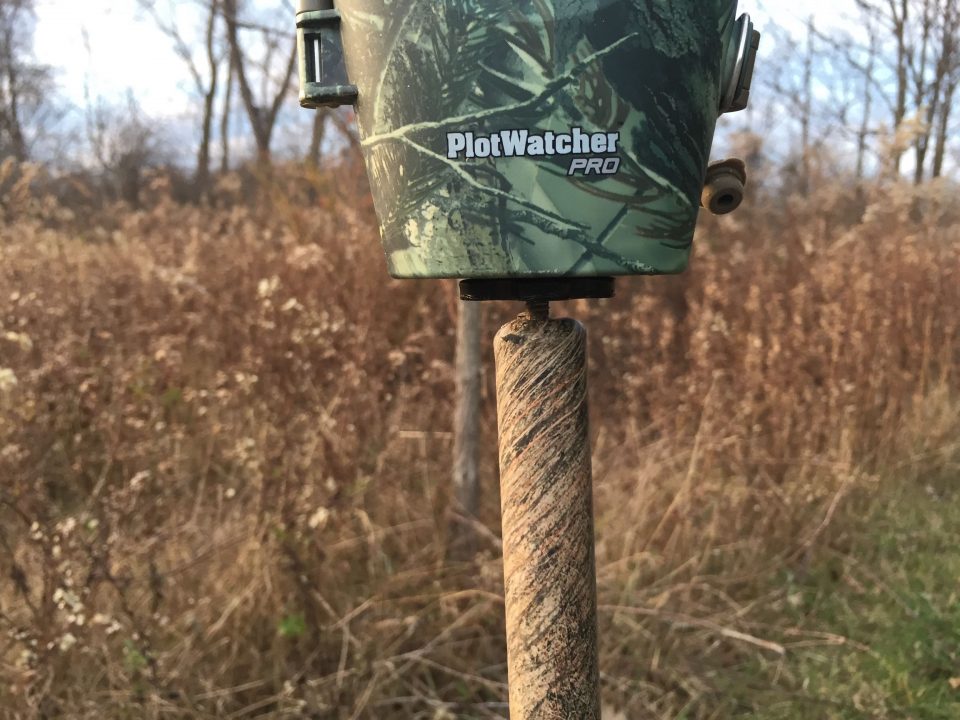
Step 6: Mount your camera on something. If you don’t have a tree where you want your cam, here’s a tip: an old shooting stick sometimes uses the same threaded screw size that is on the bottom of your camera. Take the saddle off, and voila: trail cam mono-pod!

Step 7: Get your camera set up out where you want it. Connect the cord. Test it out (well, test it once BEFORE you take it all the way out the field). Get some amazing pictures!

I’ve built a couple of these now, and have had absolutely no issues. Some potential items for consideration:
- There’s no fuse – that would be a cheap/easy add on that would offer some protection. Most trail camera’s don’t draw enough current to pose a problem, but something to consider.
- There’s no low voltage disconnect. This MOST LIKELY won’t impact your camera – it’s used to running down batteries for breakfast. If the battery draws down too far, it may reach a state where it won’t recharge. So check the battery voltage once in while to see how it goes.
- Your camera’s warranty may be voided if you don’t use THEIR battery pack. Well, they definitely won’t warranty you using a homemade rig like this – so if you have any concerns, don’t use this set up!
That’s all there is to it. I’ve had one running a cellular trail cam – a Moultrie XV-6000, for 3 months now. It’s still at 12.5 volts, and I’ve gotten thousands of pictures from it, and it’s seen many below freezing nights. That was my first setup, so I’ll post an update at the end of December!
Related Posts
-
 DIY Trail Cam Battery Pack
November 18, 2020
DIY Trail Cam Battery Pack
November 18, 2020
-
 Book Review: Making The Most of Your Deer
August 28, 2015
Book Review: Making The Most of Your Deer
August 28, 2015
-
Book Review: Gut It. Cut It. Cook It. The Deer Hunter’s Guide to Processing & Preparing Venison
August 25, 2015