
I’ll admit, I’m not a huge pastry fan. For my apple pie, PLEASE give me a crumb top – or better yet, just give me apple crisp! But when it comes to a more savory dish like braised venison and vegetables in gravy – there is something about a crispy crust on a venison pot pie that makes it totally enjoyable. Great, another addition to the book of “The Dichotomies of Don Oldfield”. As I sit here pondering this “crust acceptance” by a life long anti-cruster, I finally realize why my brain can accept this. Duh, it’s just a sandwich in disguise! Whew, costly shrink session avoided…

The Cut:
When making a pot pie, you have a ton of flexibility when it comes to your cut of meat selection. It comes down to personal preference and amount of time you want to spend cooking. Or sometimes it determined for you by “what do we still have in the freezer?”.
If you wanted to make a “quick” dinner after work (about an hour start to finish), you could cube up some loin or even tenderloin. It’s tender enough to braise for 10 minutes and be pie ready.
More typically, you would use your tougher cuts that will benefit with some slow braising time to soften them up. And here’s where personal preference comes in – how do you want the presentation to look and/or how much flavor are you looking for?
Shoulder and neck roasts are excellent choices here. They have more connective tissue which really needs a slow cook to break them down and tenderize them. This same connective tissue will give the dish more flavor. Don’t equate this to gamy-ness.. Yes, sometimes you’ll get a gamy animal, but most of the time the flavor you get from the shoulder and neck cuts is a richness (try some osso buco for the ultimate experience of this flavor) that I feel enhances the dish. Presentation wise, this same connective tissue, as it breaks down will cause your cubed meat to possibly break down. There is no downside here, unless you wanted to maintain that perfect cube look for the meat – purely visual preference.
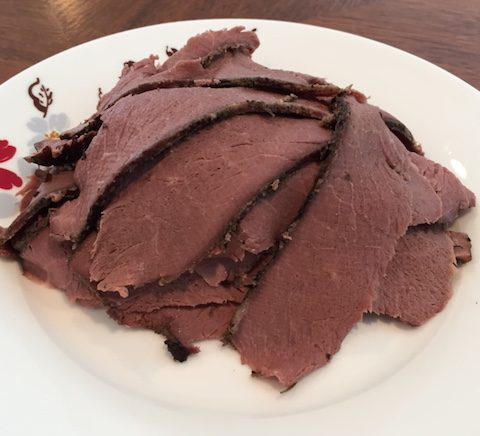
You can also use any cut from the rear quarter. The cuts from the rump are great for slow cooking, and get to the appropriate tenderness faster than the neck and shoulder cuts. And because they have less connective tissue, they can better maintain that perfect cube look – I mean, if you want it to look just like those frozen pot pies you had as a kid… So yes, that’s what I did for today’s presentation: I used a section of top round off the rear quarter.

The Ingredients:
- 1 lb venison – cubed to preference (¾” is a decent size)
- 1 quart (32 oz) venison stock or beef stock or broth
- 3 cups of frozen mixed vegetables (or use fresh of your choice – but hey it’s wintertime, EVERYTHING is coming from the freezer!)
- pie crust (I used pre-made here)
- olive oil
- vegetable oil
- salt & pepper
- garlic powder
- 3-4 tablespoons of cornstarch

The Process:
Add your venison to a bowl. Splash with some olive oil and salt, pepper, and garlic powder to taste. Mix by had to evenly coat the cubes.
Preheat oven to 250°.
In a cast iron dutch oven or similar, on medium high, heat just enough vegetable oil to coat the bottom. Sear the venison, stirring it to brown all sides. Once browned, pour in enough stock to just barely cover the venison cubes. Bring to a simmer, then cover and transfer to the oven.
The amount of time you spend braising it here will depend on what cut you chose. If you picked loin, 10 minutes on the stovetop on a low simmer will probably suffice. Neck or shoulder? Probably 3 plus hours in the oven. My top round that I used here was perfectly done at 2½ hours – nice and tender, but not falling apart. The key here is to just keep an eye on it, and when it gets to your preferred tenderness, pull it out.
With a slotted spoon, transfer the venison to a bowl. Back on the stovetop, with your dutch oven with the braising liquid still in it, add your vegetables. Add the rest of the stock/broth, and simmer till the vegetables are cooked – about 10 minutes. With a slotted spoon, transfer the vegetables to the same bowl as the venison.
Get your pie crust out of the fridge.
Now, we make the gravy. To the liquid in the dutch oven, add cornstarch to reach your thickening preference. I added 4 tablespoons for a nice thick consistency. You could go with 3 if you like it more brothy. Simmer for about 10 minutes uncovered, or until it reaches a nice consistency. Salt and pepper to taste. If you used broth instead of stock – you may not need any more salt.
Kick the oven up to 350°.
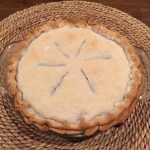
Add the venison and vegetables back to the gravy, and let them simmer while you get your bottom crust ready in a 9″ pie plate. Spoon the filling into the crust, cover with another crust. Pinch the edges, and cut slots in the top. Cook in the oven for 25 to 30 minutes, or until the crust is golden brown.
Tip: cover the edges of the crust in aluminum foil while baking, and remove the foil once the center has reached a golden brown. This will keep those edges from burning.
This is another recipe that seems like a lot of work – but most of it is just sitting around waiting. If you double or triple the recipe, you can make multiple meals at once: freeze the extra filling, and on days when you want a quicker meal, all you have to do is heat the filling, stuff in a crust and bake. Still not a 10 minute meal I know – but well worth the time.
Related Posts
-
 How to Cook Venison Sous Vide for a Perfect Roast
August 2, 2017
How to Cook Venison Sous Vide for a Perfect Roast
August 2, 2017
-
 Venison Shank Osso Buco
May 8, 2016
Venison Shank Osso Buco
May 8, 2016
-
Venison Chili – and don’t forget the Cornbread!
February 29, 2016
-
 Venison Pot Pie – Braised Venison in a Crispy Crust
February 15, 2016
Venison Pot Pie – Braised Venison in a Crispy Crust
February 15, 2016